As I mentioned in the first post about Christian's IONIQ 5, we will hopefully be doing a lot of road tripping and "car camping" in our new electric car! What I mean by car camping is: sleeping in the car rather than spending a night in a hotel while we're on long drives. We will also take it with us on our annual camping trip to Vermont (undecided if we'll use a tent for that trip since that's tradition, ha ha.)
We did a good amount of research and YouTube video watching and so far have gotten a fair amount of supplies for the car. Here's what we bought (and DIYed) to make car camping easier!
Mattress
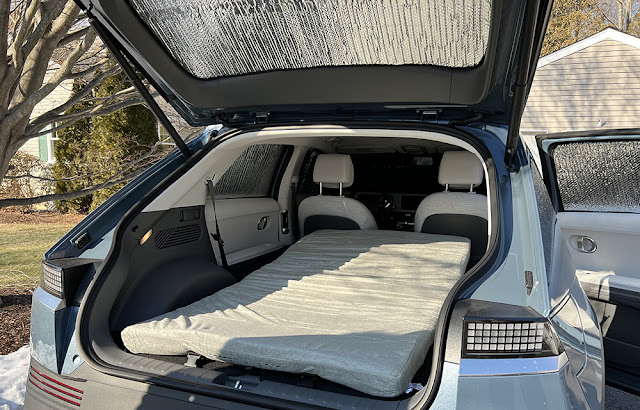
One of the first, and most important, items on our list was something to sleep on in the car. We ended up going with a 3in memory foam camping mattress that comes with straps attached so we can roll it up for easy storage. We will probably just use normal blankets instead of sleeping bags just because they will pack up nicer. Over the weekend we did a test night in the car and aside from some slight hip pain (side sleepers) it was pretty comfy!
"Garbage" Can
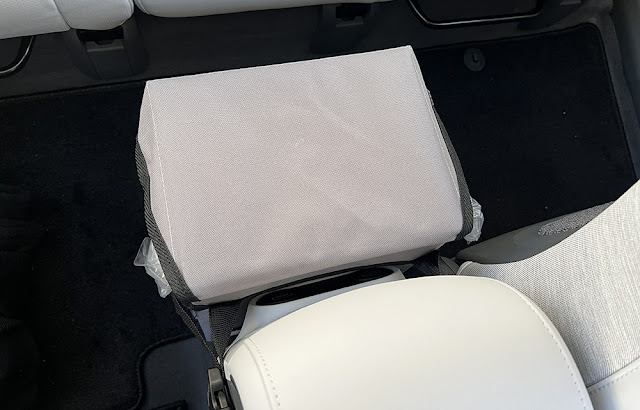
Trash is inevitable on a road trip. Take-out bags, napkins from spilling water, snack bags, you get the idea. Rather than just keeping a bunch of plastic bags in the car we wanted something a little easier on the eyes. We chose one by Lusso Gear that will fit behind the center console. It has hooks if we use an old grocery bag and want to keep it in place and side pockets for any smaller items we may want to store like wet wipes and napkins.
Kitchen Supplies
We will keep paper towels, wet wipes, etc. on hand for cleanup. We already had some of the items we needed for our kitchen/takeout setup but need a few more things that will pack easy. Here is some of what we have bought or will be buying soon:
- Stainless steel flatware sets
- Easily Packable/non-breakable Dinnerware (considering these or some from Target)
- Portable Induction Cooktop (no more propane grills for us!....well, maybe for actual camping)
- Stackable Pot & Pan set (considering this one)
- Cutting board, knives, etc. for cooking (will take what we already own for now)
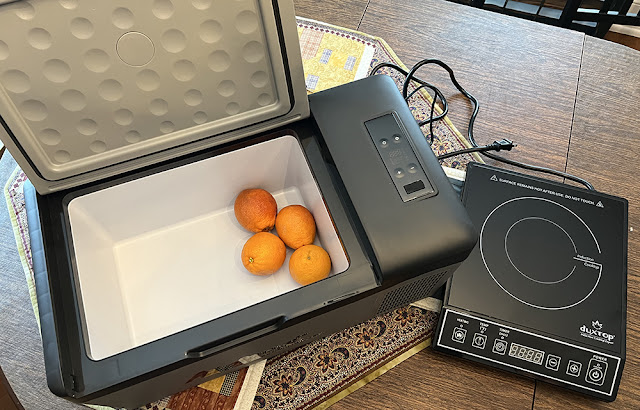
Refrigerator/Cooler
A pretty important item when camping or road tripping is somewhere to keep snacks and cold items. We thought about using a normal cooler but decided to try a portable fridge instead. We've got a huge battery, why not use it? Christian ended up choosing the Alpicool Portable Refrigerator which will fit nicely in between the front & back seats. We scored it on a lightening deal so it was under $200.
Dishwasher
We were ALMOST going to buy an adorable mini dishwasher, named Bob, that I found recently but the day Christian was going to pull the trigger (after agonizing over the decision because it's super frivolous) the price went up $50 and the delivery estimate went from July to September - so sad! Guess it's still a little bucket and camping safe soap.Electronics
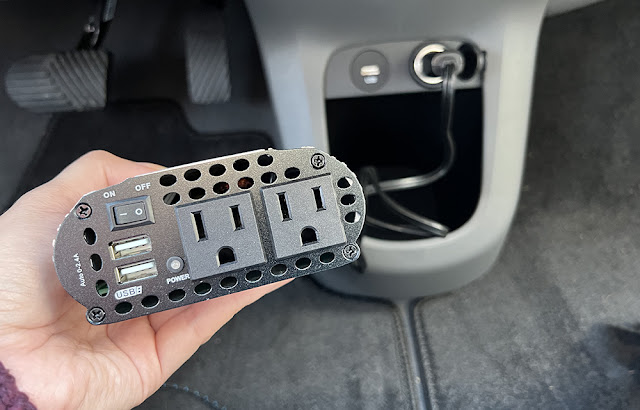
Christian is big into tech and gaming so we definitely needed an entertainment system setup. To get started he bought a 300W power inverter for one of the cigarette lighters in the car. That way we can power normal AC powered devices through the car battery. He also picked up a portable monitor so we could play games together on his Nintendo Switch and watch movies.
Another random item normal drivers may not need is an OBD Check scanner so he can monitor the battery temperature and other driving diagnostics.
Window Covers
Window covers are key for when you want to sleep in your car. They keep out prying eyes as well as light for when you need to rest. If you use reflective covers they will insulate the car from both cold and heat. It would have been very expensive to buy custom window covers that fit the car properly and buying cheaper options would not look that great so we decided to DIY them! You can google how others have made these but we combined a few approaches. I'll put a quick guide below, let me know if you want a full blog post (I may do one anyway.)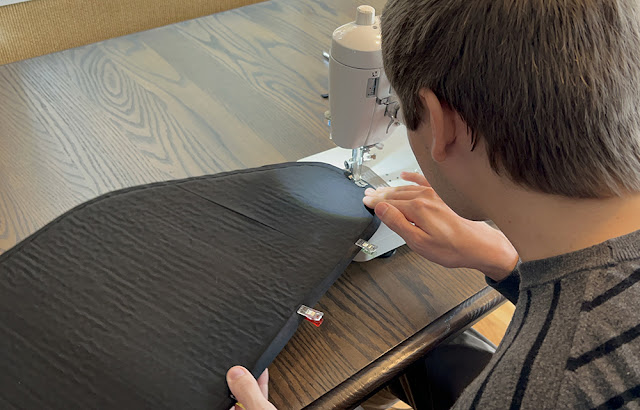

Supplies:
- Kraft paper roll (or printer paper/newspaper and tape)
- Pencil or Sharpie
- Reflectix insulation roll
- Black fabric (we went for cotton but almost bought fleece)
- Quilt binding
- 3M Hi-Strength (90) Spray Adhesive
- Heavy duty sewing machine needles
Directions:
- Use paper to make a template of your window. Trace the outline of the window onto the paper and cut out. Place back in window to make sure it fits properly.
- Cut out your Reflectix insulation using the template. Place in window to make sure it fits. Trim if necessary.
- Either cut out your fabric with the same template or cut your fabric a little larger than the insulation
- Use spray adhesive to attach the fabric to the insulation (spray both sides and wait until tacky before putting them together.) We left one side without fabric so we could use the reflective properties of the insulation when needed.
- If you cut out your fabric larger than the insulation: trim after gluing or use the extra in place of binding.
- Using glue or a sewing machine attach your quilt binding around the whole piece. You could also use duct tape for this step.
Shop the post:

Share On


It's great you've got your car equipped for camping so easily! I like how you made the window covers yourself too, really crafty! :)
ReplyDeleteHope your week is a good one so far :)
Away From The Blue